As someone who homebrews beer two to three times a month I am always looking for ways to save time and money. Washing yeast is a great way to save on both. Well, maybe it doesn’t really save you time. However, it is nice to be able to have a variety of yeast strains on hand so you can brew what you want when you want, without a trip to the homebrew store or waiting for a delivery.
Originally, I washed yeast by following the steps I saw from various YouTube videos. Most followed the same process. After racking your beer off the trub, add boiled and chilled water to your fermenter. Mix, lay the fermenter on its side, wait, pour off the milky/yeasty water into smaller and smaller vessels until you are satisfied. Generally using glass pint jars as your final storage. I felt like I could improve on this process.
The method I use has 3 steps. It may not be wholly original, or even my idea (surely someone has done this before). I feel like I have improved my process enough, I like the results, and thought it was worth sharing.
Before you begin, make sure you have:

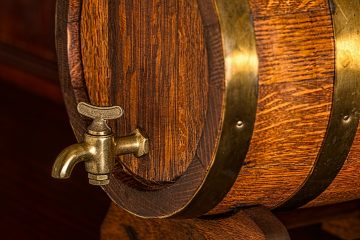
- Fermenter with a spigot. Really, a spigot on your fermenter is so useful, you should get a fermenter with one regardless. As long as you are not using glass, it’s pretty easy to add one.
- 1 gallon or more of sterile water. Boil water, or just use a $1 jug of distilled water.
- 6-8 pint jars with lids. These are our intermediary containers only used for 1 day.
- 3-4 50ml conical test tubes. Our final containers will allow us to store a lot of yeast in a small area and give us some kind of measurement of yeast.
- Sanitizer. This is probably obvious to many of you, but make sure everything the yeast touches has been sanitized.
1. Wash
With the beer bottled or kegged we are left with the trub at the bottom of the fermentor. We will next add about 1 gallon of sterile water. You can boil your own and cool it, but honestly, it is faster and probably cheaper, to get a $1 gallon jug of distilled water from a local grocery store or pharmacy. I recommend that your water is a little warmer than your yeast ferments in. Water at 72F is what I aim for, as I feel the yeast gets into suspension easier. Be careful not to shock the yeast if you have cold crashed. Nobody likes to be jolted awake. Shake the trub and water like you aerating your wort and set the fermentor in a location where you will able able to use it for the next step without moving it.

2. Jar

After the trub has settled to just under the middle of your spigot it is time to “jar” your yeast. Simply rack off all the milky/yeasty layer into pint jars with the spigot. I like to do 6 pints, filling each one up half-way, then rotating through again to get everything topped off. If there is more to rack I might do another pint jar or two. Screw on the lids tight and put them all in the fridge for at least 8 hours. I normally try to chill for 24 hours to get the yeast settled down and compacted as much as possible.
3. Tube

The next day you can see that the yeast has settled nicely on the bottom of your pint jars. The next step is to get that yeast into tubes. Decant off all the liquid you can. Then swirl up the yeast on the bottom of the jar to loosen it up. Pour the yeast off into a sanitized tube. I can normally get 2 pint jars worth of yeast into one 50mL tube, but you will have to see how yours goes. Seal up the tubes and mark them with the strain, date, and generation and you are ready for storage. After refrigerating again, you will see the yeast settle down and you will be able to gauge how much yeast you captured. I don’t want to get into cell counts because I am no expert, but at least with a mL measurement you will be able to roughly gauge how much yeast you have collected.
Some final notes: I would plan on using this yeast within a year. Depending on the strain and yeast health you will lose cells over time no matter what. You will also ALMOST ALWAYS want to do a starter with washed/harvested yeast. Here is a link to creating a starter in just minutes. This will ensure you are pitching healthy yeast into your wort. I have used washed yeast and starters for dozens of batches of beer and have not had any issues with the process yes. Just be aware of sanitization, cell health, and cell count and do your best to keep your yeasty friends happy and healthy and they will repay you with delicious beer in the end.


